CATEGORIES
- amigurumi (18)
- craftivity (14)
- how-to (7)
- inspiration (19)
- mini-me (9)
- project (49)
- reknit (3)
- repair (2)
Showing posts with label animal. Show all posts
Sunday, 29 June 2014
Jacob's bear
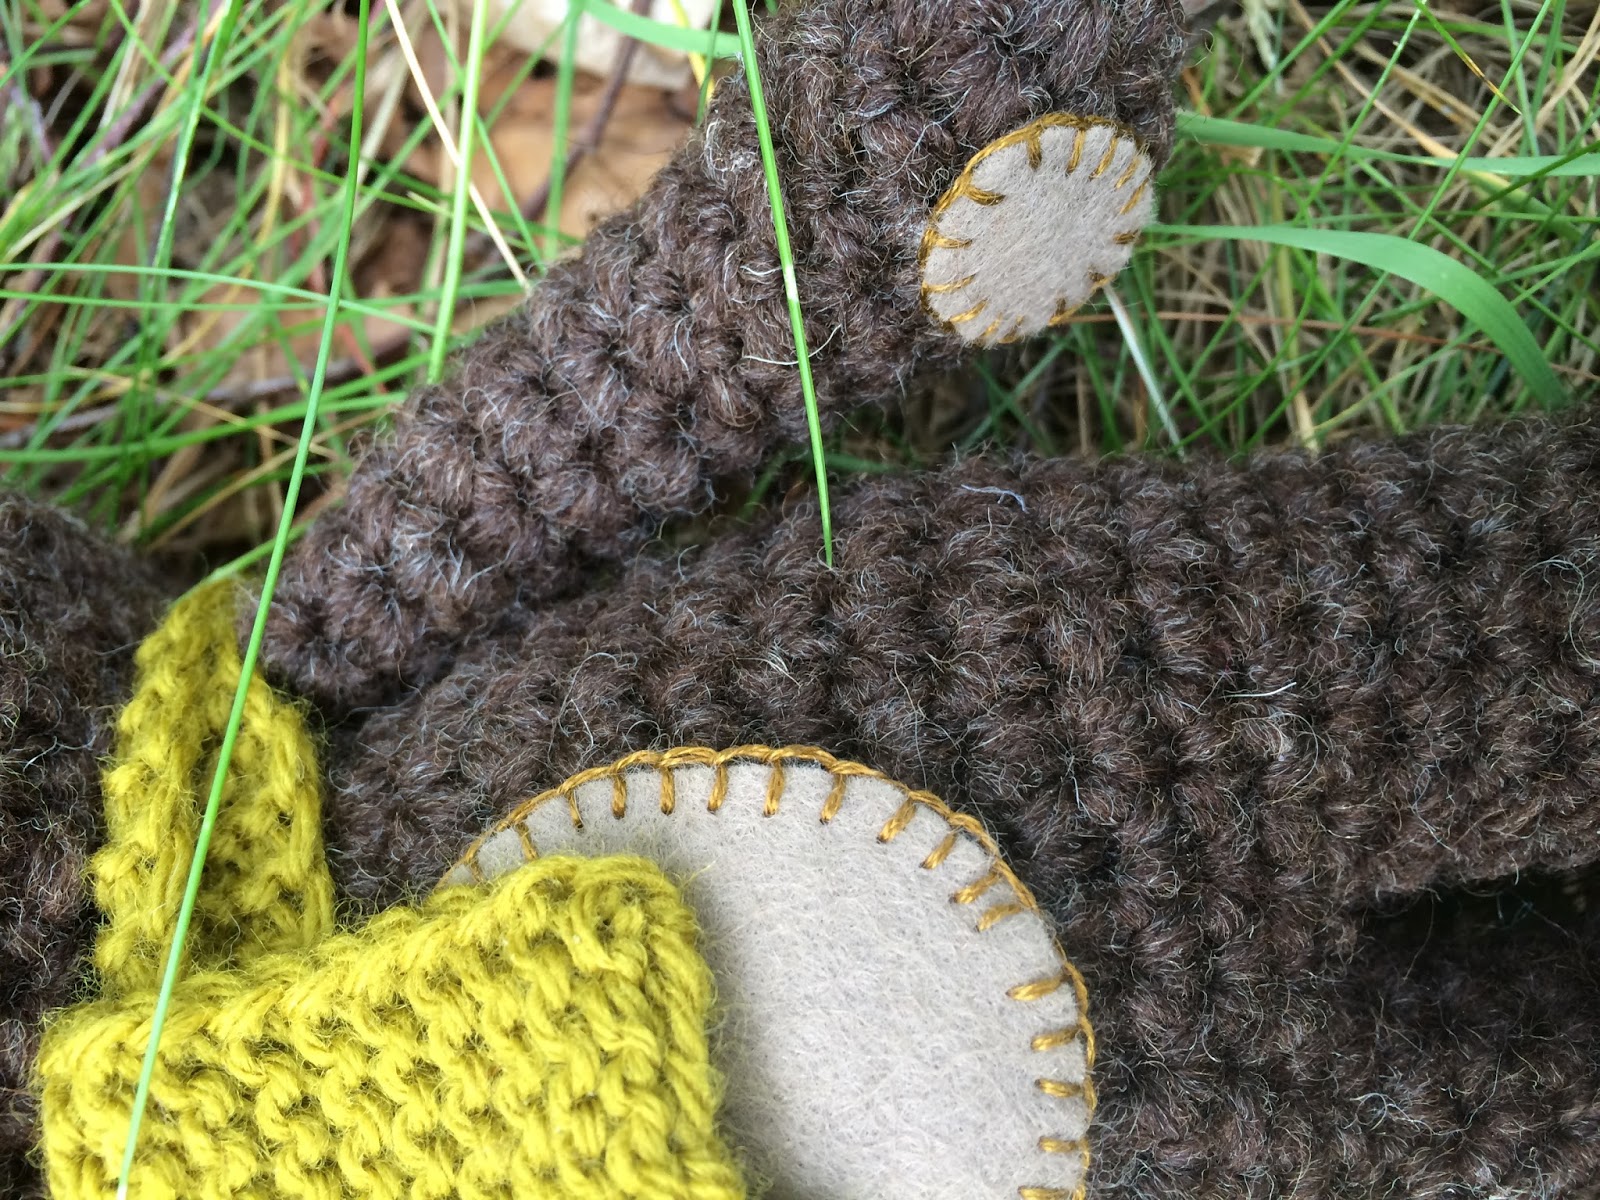
Bianca calls Jacob "beertje", Helle was so kind to help me with this clue. cause I was a bit clueless about what to crochet for Bianca's baby. So it became a bear in perfect Bianca colours; brownish with accent of mostard yellow and beige. I'm particularly proud and happy about the felt-embroidery detailing of this bear.
Thursday, 2 January 2014
hysterical manga rabbit amigurumi
This sweet yet with hysterically screaming contrast colours amigurumi was originally inspired by the pink mohair that I used as hair. That is, the pink mohair I tried to make look like hair. Not really that rabbits have hair... but... in the end it ended looking more like a hat i would say. This amigurumi I prepared for the workshop and exhibition in Sønderborg, Denmark earlier this year, in order to test the pattern and have some models to show.
The crochet heart on the front of the t-shirt is made following these instructions from Skip-to-my-lou
The rest of the yarn for this "rumi" came from some recent donations from my mom; the very fresh green and light pink on the head. The pink from the skirt came from some knitted towels I had. afraid it must have been an aunt or perhaps even my granny that once knitted that for me. But I don't like pink in my home, so I decided to sacrifice it. Finished off those feet/paws with some supersoft white mohair.
The crochet heart on the front of the t-shirt is made following these instructions from Skip-to-my-lou
The rest of the yarn for this "rumi" came from some recent donations from my mom; the very fresh green and light pink on the head. The pink from the skirt came from some knitted towels I had. afraid it must have been an aunt or perhaps even my granny that once knitted that for me. But I don't like pink in my home, so I decided to sacrifice it. Finished off those feet/paws with some supersoft white mohair.
| colour and yarn selection for the hysterical manga rabbit "rumi" |
Monday, 30 December 2013
Delfts Blue Amigurumi (madam Blå)
Another "rumi" based on the pattern for the basic amigurumi pattern link. I prepared for this amigurumi a long time ago when I bought the blue colour-run/tie-dye blue cotton yarn. I also had another swatch of thin sewing yarn that also had a blue colour-run, bought even longer ago, perhaps almost 20 years ago. Anyways always thought they were the perfect match but what to make? So suddenly as I was preparing for the exhibition and workshop I thought, hey I will make a rabbit. and I was somewhat inspired because I had seen this Dutch porcelain clog with Delfts Blue pattern on it.
As I was doing the works and also in parallel preparing for the exhibition; meaning cleaning up my image archive to create some posters, I suddenly came across the picture with which this had all started. it's a rather old baby-picture, an image a colleague send, and I remember I thought back then ah, I will crochet a Delfts Blue Singaporean Merlion ( this colleague lives is a Dutch living in Singapore) but as things went I never got to make the Merlion, and had also completely forgotten about the idea, until I encountered the image again.
| Delfts Blue Amigurumi Rabbit, the Delfts Blue flower pattern turned into a flower shawl, still wondering if I should embroider them onto the shirt... |
| the initial yarn selection and colour-card I made for the rabbit. again; I don't recommend to use those eyes, it didn't work well in the end. |
As I was doing the works and also in parallel preparing for the exhibition; meaning cleaning up my image archive to create some posters, I suddenly came across the picture with which this had all started. it's a rather old baby-picture, an image a colleague send, and I remember I thought back then ah, I will crochet a Delfts Blue Singaporean Merlion ( this colleague lives is a Dutch living in Singapore) but as things went I never got to make the Merlion, and had also completely forgotten about the idea, until I encountered the image again.
| Mik, 2007 |
Friday, 20 December 2013
Pyke's amigurumi rabbit
Christmas holiday has begun, which means I have some time to finally update the blog with a little story about Pyke's rabbit. I made it over the summer following the basic amigurumi pattern.
Pyke is the son of our friends, in this case what inspired me was the particular taste of colour of his mum and the embroidered name-card that his parents send to us when he was born.
| by choosing the colours of the yarn, I choose and set the general mood of Pyke |
| the name-card send when Pyke was born. |
![]() |
| here's Pyke with Pyke (and his dad) he really likes to chew on the ears. |
Sunday, 17 November 2013
crochet a basic Amigurumi rabbit, hækle en basis Amigurumi kanin
(Dansk oversættelse nedenunder)
Finally it's here the basic Amigurumi crochet pattern. I'm sorry it took so long for me to get the pattern written-up and put online, but my day-job has been very demanding ever since the workshop and exhibition. And besides from that also had a bad back and a cold to fight. But now I'm feeling good again and have the energy and time to get this shared.
Both during the workshop and in the aftermath, mistakes were found in the first pattern, I have corrected those in this version. The worst mistake was that the arm was missing. I'm terribly sorry about that. Besides from that mistakes were small, such as not giving the right row for the placement of eyes and mouth.
As you have probably already noticed the pattern is drawn in the Japanese way. In principle it's super-logic, if you read the legend first and then follow the signs it speaks for itself. You start with the head, the top of the head, and basically crochet in circles, increasing and decreasing to make the shape. The head, body and legs are all made out of one piece. The eyes, ears and nose are made as loose decorative pieces that you stitch on. The underside of the foots are like lids that you stitch on to close off, and the arms are crochetted seperately and stitched on. Amigutumi is crochetted tightly and you need to stuff the amigurumi as you go, particularly the head needs to be well stuffed.
wrt further colouring, patterning and styling, the only limit is your imagination. You can make stripes, dots, little characters exactly as you please. I usually use left-over yarns, as I find it interesting how the limited choice of materials can lead to new creative ideas.
I have a little advise, amigurumi needs to be crochetted tight, but don't let that lead to tight and tense shoulders. You should take regular breaks and move shoulders, arms and hands to get the blood circulated. F.x. you can stand up and gently swing your arms back and forwards that's a very good exercise.
I wish you all good luck with crocheting, if you have questions, have remarks or find more mistakes you are most welcome to shoot an email to hannepanne@theknitbitch.com. I cannot primise that I will always answer straight away, as my day-job is quite demanding and will keep me very occupied until end of this year.
I'm pondering on a christmas-doll (nisse in Danish) but unfortunately not sure if I will manage this year. But keep watching this space.
Så er den der endelig, Amigurumi hækle kaninen. I må meget undeskylde at det har taget så længe inden jeg har fået lavet opskriften færdig og sat den online. Men som god undskyldning må jeg sige at mit day-job lige har været lidt krævende siden udstillingen, og så har jeg lige været nede og ligge med ondt i ryggen og forkølse. Men nu er jeg ovenpå igen, og her er så opskriften.
Både i løbet af workshoppen og også bagefter har der været en del fejlmeldninger, så dem har jeg alle sammen rettet. En af de mere dramatiske fejl var at jeg havde glemt at give opskriften til armen. Det må I altså meget undskylde allesammen. Ellers var fejlene små, det drejede sig fx om i hvilken række man skulle placere øjnene.
Som du nok allerede har set er mønstret tegnet på rigtig Japansk vis. I princippet er det super-logisk eller som at bruge Margit's ord "logik for perlehøns". Du begynder i toppen af hovedet, og hækler så simpelthen cirkler og tager ud og ind, sådan opstår formen. Hovedet, kroppen og benene er hæklet ud i et stykke. Al dekoration; snude, øjne og ører, er hæklet som løse dele og broderes på. Ligeså med armene. Og bunden af fødderne er ligesom nogen låg, man bruger til at lukke med. Amigurumi skal hækles stramt og fyldes mens man hækler, så altså fyld hovedet når du er kommet til halsen osv.
mht videre modellering, farvebrug og typologi, er det kun din fantasi der er begrænsningen :-) du kan gøre ligesom du vil, bruge de farver du gerne vil, lave striber, prikker ligesom det passer dig. Jeg bruger altid garn-rester, så tvinger begrænsningen af materiale en til at være kreativ og lave noget skørt.
Jeg har også lige et godt råd; amigurumi skal hækles meget stramt, men husk at tænke på ikke at spænde skuldrene for meget, og tag godt med pauser hvor du bevæger både arme, skuldre og hænderne for at faa godt gang i blod-cirkulationen. fx kan man stå op og let svinge med armene det har en god effekt.
Jeg ønsker jer allesammen held og lykke med hæklningen, hvis I har spørgsmaal, bemærkninger eller finder flere fejl, er I mere end velkomne til at maile til hannepanne@theknitbitch.com. Jeg kan ikke love at jeg altid svarer sådan lige vupti, for som sagt er mit day-job krævende, indtil årets slutning har jeg meget travlt.
jeg pønser lidt på en jule-nisse, men tror desværre ikke jeg når det i år. Men keep watching this space.
Finally it's here the basic Amigurumi crochet pattern. I'm sorry it took so long for me to get the pattern written-up and put online, but my day-job has been very demanding ever since the workshop and exhibition. And besides from that also had a bad back and a cold to fight. But now I'm feeling good again and have the energy and time to get this shared.
Both during the workshop and in the aftermath, mistakes were found in the first pattern, I have corrected those in this version. The worst mistake was that the arm was missing. I'm terribly sorry about that. Besides from that mistakes were small, such as not giving the right row for the placement of eyes and mouth.
As you have probably already noticed the pattern is drawn in the Japanese way. In principle it's super-logic, if you read the legend first and then follow the signs it speaks for itself. You start with the head, the top of the head, and basically crochet in circles, increasing and decreasing to make the shape. The head, body and legs are all made out of one piece. The eyes, ears and nose are made as loose decorative pieces that you stitch on. The underside of the foots are like lids that you stitch on to close off, and the arms are crochetted seperately and stitched on. Amigutumi is crochetted tightly and you need to stuff the amigurumi as you go, particularly the head needs to be well stuffed.
wrt further colouring, patterning and styling, the only limit is your imagination. You can make stripes, dots, little characters exactly as you please. I usually use left-over yarns, as I find it interesting how the limited choice of materials can lead to new creative ideas.
I have a little advise, amigurumi needs to be crochetted tight, but don't let that lead to tight and tense shoulders. You should take regular breaks and move shoulders, arms and hands to get the blood circulated. F.x. you can stand up and gently swing your arms back and forwards that's a very good exercise.
I wish you all good luck with crocheting, if you have questions, have remarks or find more mistakes you are most welcome to shoot an email to hannepanne@theknitbitch.com. I cannot primise that I will always answer straight away, as my day-job is quite demanding and will keep me very occupied until end of this year.
I'm pondering on a christmas-doll (nisse in Danish) but unfortunately not sure if I will manage this year. But keep watching this space.
Så er den der endelig, Amigurumi hækle kaninen. I må meget undeskylde at det har taget så længe inden jeg har fået lavet opskriften færdig og sat den online. Men som god undskyldning må jeg sige at mit day-job lige har været lidt krævende siden udstillingen, og så har jeg lige været nede og ligge med ondt i ryggen og forkølse. Men nu er jeg ovenpå igen, og her er så opskriften.
Både i løbet af workshoppen og også bagefter har der været en del fejlmeldninger, så dem har jeg alle sammen rettet. En af de mere dramatiske fejl var at jeg havde glemt at give opskriften til armen. Det må I altså meget undskylde allesammen. Ellers var fejlene små, det drejede sig fx om i hvilken række man skulle placere øjnene.
Som du nok allerede har set er mønstret tegnet på rigtig Japansk vis. I princippet er det super-logisk eller som at bruge Margit's ord "logik for perlehøns". Du begynder i toppen af hovedet, og hækler så simpelthen cirkler og tager ud og ind, sådan opstår formen. Hovedet, kroppen og benene er hæklet ud i et stykke. Al dekoration; snude, øjne og ører, er hæklet som løse dele og broderes på. Ligeså med armene. Og bunden af fødderne er ligesom nogen låg, man bruger til at lukke med. Amigurumi skal hækles stramt og fyldes mens man hækler, så altså fyld hovedet når du er kommet til halsen osv.
mht videre modellering, farvebrug og typologi, er det kun din fantasi der er begrænsningen :-) du kan gøre ligesom du vil, bruge de farver du gerne vil, lave striber, prikker ligesom det passer dig. Jeg bruger altid garn-rester, så tvinger begrænsningen af materiale en til at være kreativ og lave noget skørt.
Jeg har også lige et godt råd; amigurumi skal hækles meget stramt, men husk at tænke på ikke at spænde skuldrene for meget, og tag godt med pauser hvor du bevæger både arme, skuldre og hænderne for at faa godt gang i blod-cirkulationen. fx kan man stå op og let svinge med armene det har en god effekt.
Jeg ønsker jer allesammen held og lykke med hæklningen, hvis I har spørgsmaal, bemærkninger eller finder flere fejl, er I mere end velkomne til at maile til hannepanne@theknitbitch.com. Jeg kan ikke love at jeg altid svarer sådan lige vupti, for som sagt er mit day-job krævende, indtil årets slutning har jeg meget travlt.
jeg pønser lidt på en jule-nisse, men tror desværre ikke jeg når det i år. Men keep watching this space.
Saturday, 15 October 2011
bigger-than-life-size doudou
If you can't have a real pet, why not make a life-size doudou and put in your living-room? Making and having a full size doudou sort of makes it ok for adults, doesn't it. It would also add an air of mystery and fairy-tale to your living-room.
These ones here are perhaps a little more advanced. They are made to be art-objects, but when I saw them, I wanted to take them right home. Look so real. It's the artist Cosima von Bonin, she incorporates a lot of animals like dogs and mushroom (also bigger-than-life-size) in her work. I guess she wants to tickle our affection for pets and maybe ask if other humans could really be replaced by animals?
And how about these, actual interior objects, made to put in your living-room.
Different technique; mosaique. such a pity you don't find dogs like this in the DIY, they seem to only be doing dwarfs.
And here's the pattern to make one yourself, just blow up the size!
Have fun!
| Little deer photographed in Causeway Bay |
These ones here are perhaps a little more advanced. They are made to be art-objects, but when I saw them, I wanted to take them right home. Look so real. It's the artist Cosima von Bonin, she incorporates a lot of animals like dogs and mushroom (also bigger-than-life-size) in her work. I guess she wants to tickle our affection for pets and maybe ask if other humans could really be replaced by animals?
| Cosima von Bonin @ Documenta |
| Cosima von Bonin @ Documenta |
| Cosima von Bonin @ Documenta |
| Cosima von Bonin @ Documenta |
And how about these, actual interior objects, made to put in your living-room.
Different technique; mosaique. such a pity you don't find dogs like this in the DIY, they seem to only be doing dwarfs.
| Milan Designweek 2008 |
| Milan Designweek 2008 |
And here's the pattern to make one yourself, just blow up the size!
![]() |
| Libelle Magazine 1951 |
Have fun!
Labels:
animal,
bigger-than-life,
craft,
diy,
doudou,
inspiration,
make,
pet,
sewing,
super-size
Friday, 29 July 2011
Amigurumi update
My latest amigurumi is Findus. He's based on a drawing that Julie made, unfortunately we lost it in the process. Findus is a hedghog builder, that's why he's wearing orange wellys and suspenders. His belly and the inside of his ears are soft pink. Findus as you can see has spines on his head and all the way down his bag. Findus is feeling a little bit cold that's why he's wearing a warm and comfy scarf. He might even be on the edge of having a cold, because his eyes are very tired too. hope you like him!
And so whilst I'm at it, here are all my amigurumi over the last 5 years!
you can see them all at www.flickr.com/knitbitch
here are a couple of zooms on some of the avatars that I have been working on.
| Helene and Oliver at their wedding |
![]() |
| Leo at her 40 years birthday |
Sunday, 10 February 2008
amalgamations
![]() | ||
| Thomas Grunfeld out of the series of Three Misfits 1994 |
| Sci-fi Sfinx by Enki Bilal |
The Griffin outside st.Marks basilica in Venice,
|
| The winged lion st. Mark, the patron saint of Venice. |
| another winged Lion, I think. You find them all over the place in Venice.This time build into the facade of a hospital. (if I remember right) |
| Another Griffin in Padova,Italy. |
Subscribe to:
Posts (Atom)