CATEGORIES
- amigurumi (18)
- craftivity (14)
- how-to (7)
- inspiration (19)
- mini-me (9)
- project (49)
- reknit (3)
- repair (2)
Showing posts with label how-to. Show all posts
Saturday, 31 October 2015
Knitted christmas balls advents calendar
This knitted christmas balls advents calendar is for my mum, she loves christmas. It's a labor of love, I would say, what have I gotten myself into? 25 christmas balls is a lot. I have now knitted 14, just 11 to go..... the pattern is now published in my Revelry shop, so you can start making your own.
Sunday, 27 April 2014
How-to knit Kings Balls
Here's the patterns for the Kingsday rings I was knitting in-public on Kingsday in Korte Lauwerstraat in Utrecht. Pattern is fairly straight forward and self-explanatory. The basic model is based on the infamous christmas balls by Arne & Carlos. If you want to make an easier and simpler model, you can easily drop the flag stripes in the tips.


Labels:
balls,
how-to,
kingsballs,
knitting,
koningsdag,
utrecht
Location:
Wittevrouwen, Utrecht, Nederland
Sunday, 17 November 2013
crochet a basic Amigurumi rabbit, hækle en basis Amigurumi kanin
(Dansk oversættelse nedenunder)
Finally it's here the basic Amigurumi crochet pattern. I'm sorry it took so long for me to get the pattern written-up and put online, but my day-job has been very demanding ever since the workshop and exhibition. And besides from that also had a bad back and a cold to fight. But now I'm feeling good again and have the energy and time to get this shared.
Both during the workshop and in the aftermath, mistakes were found in the first pattern, I have corrected those in this version. The worst mistake was that the arm was missing. I'm terribly sorry about that. Besides from that mistakes were small, such as not giving the right row for the placement of eyes and mouth.
As you have probably already noticed the pattern is drawn in the Japanese way. In principle it's super-logic, if you read the legend first and then follow the signs it speaks for itself. You start with the head, the top of the head, and basically crochet in circles, increasing and decreasing to make the shape. The head, body and legs are all made out of one piece. The eyes, ears and nose are made as loose decorative pieces that you stitch on. The underside of the foots are like lids that you stitch on to close off, and the arms are crochetted seperately and stitched on. Amigutumi is crochetted tightly and you need to stuff the amigurumi as you go, particularly the head needs to be well stuffed.
wrt further colouring, patterning and styling, the only limit is your imagination. You can make stripes, dots, little characters exactly as you please. I usually use left-over yarns, as I find it interesting how the limited choice of materials can lead to new creative ideas.
I have a little advise, amigurumi needs to be crochetted tight, but don't let that lead to tight and tense shoulders. You should take regular breaks and move shoulders, arms and hands to get the blood circulated. F.x. you can stand up and gently swing your arms back and forwards that's a very good exercise.
I wish you all good luck with crocheting, if you have questions, have remarks or find more mistakes you are most welcome to shoot an email to hannepanne@theknitbitch.com. I cannot primise that I will always answer straight away, as my day-job is quite demanding and will keep me very occupied until end of this year.
I'm pondering on a christmas-doll (nisse in Danish) but unfortunately not sure if I will manage this year. But keep watching this space.
Så er den der endelig, Amigurumi hækle kaninen. I må meget undeskylde at det har taget så længe inden jeg har fået lavet opskriften færdig og sat den online. Men som god undskyldning må jeg sige at mit day-job lige har været lidt krævende siden udstillingen, og så har jeg lige været nede og ligge med ondt i ryggen og forkølse. Men nu er jeg ovenpå igen, og her er så opskriften.
Både i løbet af workshoppen og også bagefter har der været en del fejlmeldninger, så dem har jeg alle sammen rettet. En af de mere dramatiske fejl var at jeg havde glemt at give opskriften til armen. Det må I altså meget undskylde allesammen. Ellers var fejlene små, det drejede sig fx om i hvilken række man skulle placere øjnene.
Som du nok allerede har set er mønstret tegnet på rigtig Japansk vis. I princippet er det super-logisk eller som at bruge Margit's ord "logik for perlehøns". Du begynder i toppen af hovedet, og hækler så simpelthen cirkler og tager ud og ind, sådan opstår formen. Hovedet, kroppen og benene er hæklet ud i et stykke. Al dekoration; snude, øjne og ører, er hæklet som løse dele og broderes på. Ligeså med armene. Og bunden af fødderne er ligesom nogen låg, man bruger til at lukke med. Amigurumi skal hækles stramt og fyldes mens man hækler, så altså fyld hovedet når du er kommet til halsen osv.
mht videre modellering, farvebrug og typologi, er det kun din fantasi der er begrænsningen :-) du kan gøre ligesom du vil, bruge de farver du gerne vil, lave striber, prikker ligesom det passer dig. Jeg bruger altid garn-rester, så tvinger begrænsningen af materiale en til at være kreativ og lave noget skørt.
Jeg har også lige et godt råd; amigurumi skal hækles meget stramt, men husk at tænke på ikke at spænde skuldrene for meget, og tag godt med pauser hvor du bevæger både arme, skuldre og hænderne for at faa godt gang i blod-cirkulationen. fx kan man stå op og let svinge med armene det har en god effekt.
Jeg ønsker jer allesammen held og lykke med hæklningen, hvis I har spørgsmaal, bemærkninger eller finder flere fejl, er I mere end velkomne til at maile til hannepanne@theknitbitch.com. Jeg kan ikke love at jeg altid svarer sådan lige vupti, for som sagt er mit day-job krævende, indtil årets slutning har jeg meget travlt.
jeg pønser lidt på en jule-nisse, men tror desværre ikke jeg når det i år. Men keep watching this space.
Finally it's here the basic Amigurumi crochet pattern. I'm sorry it took so long for me to get the pattern written-up and put online, but my day-job has been very demanding ever since the workshop and exhibition. And besides from that also had a bad back and a cold to fight. But now I'm feeling good again and have the energy and time to get this shared.
Both during the workshop and in the aftermath, mistakes were found in the first pattern, I have corrected those in this version. The worst mistake was that the arm was missing. I'm terribly sorry about that. Besides from that mistakes were small, such as not giving the right row for the placement of eyes and mouth.
As you have probably already noticed the pattern is drawn in the Japanese way. In principle it's super-logic, if you read the legend first and then follow the signs it speaks for itself. You start with the head, the top of the head, and basically crochet in circles, increasing and decreasing to make the shape. The head, body and legs are all made out of one piece. The eyes, ears and nose are made as loose decorative pieces that you stitch on. The underside of the foots are like lids that you stitch on to close off, and the arms are crochetted seperately and stitched on. Amigutumi is crochetted tightly and you need to stuff the amigurumi as you go, particularly the head needs to be well stuffed.
wrt further colouring, patterning and styling, the only limit is your imagination. You can make stripes, dots, little characters exactly as you please. I usually use left-over yarns, as I find it interesting how the limited choice of materials can lead to new creative ideas.
I have a little advise, amigurumi needs to be crochetted tight, but don't let that lead to tight and tense shoulders. You should take regular breaks and move shoulders, arms and hands to get the blood circulated. F.x. you can stand up and gently swing your arms back and forwards that's a very good exercise.
I wish you all good luck with crocheting, if you have questions, have remarks or find more mistakes you are most welcome to shoot an email to hannepanne@theknitbitch.com. I cannot primise that I will always answer straight away, as my day-job is quite demanding and will keep me very occupied until end of this year.
I'm pondering on a christmas-doll (nisse in Danish) but unfortunately not sure if I will manage this year. But keep watching this space.
Så er den der endelig, Amigurumi hækle kaninen. I må meget undeskylde at det har taget så længe inden jeg har fået lavet opskriften færdig og sat den online. Men som god undskyldning må jeg sige at mit day-job lige har været lidt krævende siden udstillingen, og så har jeg lige været nede og ligge med ondt i ryggen og forkølse. Men nu er jeg ovenpå igen, og her er så opskriften.
Både i løbet af workshoppen og også bagefter har der været en del fejlmeldninger, så dem har jeg alle sammen rettet. En af de mere dramatiske fejl var at jeg havde glemt at give opskriften til armen. Det må I altså meget undskylde allesammen. Ellers var fejlene små, det drejede sig fx om i hvilken række man skulle placere øjnene.
Som du nok allerede har set er mønstret tegnet på rigtig Japansk vis. I princippet er det super-logisk eller som at bruge Margit's ord "logik for perlehøns". Du begynder i toppen af hovedet, og hækler så simpelthen cirkler og tager ud og ind, sådan opstår formen. Hovedet, kroppen og benene er hæklet ud i et stykke. Al dekoration; snude, øjne og ører, er hæklet som løse dele og broderes på. Ligeså med armene. Og bunden af fødderne er ligesom nogen låg, man bruger til at lukke med. Amigurumi skal hækles stramt og fyldes mens man hækler, så altså fyld hovedet når du er kommet til halsen osv.
mht videre modellering, farvebrug og typologi, er det kun din fantasi der er begrænsningen :-) du kan gøre ligesom du vil, bruge de farver du gerne vil, lave striber, prikker ligesom det passer dig. Jeg bruger altid garn-rester, så tvinger begrænsningen af materiale en til at være kreativ og lave noget skørt.
Jeg har også lige et godt råd; amigurumi skal hækles meget stramt, men husk at tænke på ikke at spænde skuldrene for meget, og tag godt med pauser hvor du bevæger både arme, skuldre og hænderne for at faa godt gang i blod-cirkulationen. fx kan man stå op og let svinge med armene det har en god effekt.
Jeg ønsker jer allesammen held og lykke med hæklningen, hvis I har spørgsmaal, bemærkninger eller finder flere fejl, er I mere end velkomne til at maile til hannepanne@theknitbitch.com. Jeg kan ikke love at jeg altid svarer sådan lige vupti, for som sagt er mit day-job krævende, indtil årets slutning har jeg meget travlt.
jeg pønser lidt på en jule-nisse, men tror desværre ikke jeg når det i år. Men keep watching this space.
Sunday, 28 April 2013
Crochet a Queensday ring
What’s more Dutch for Queensday than a king or queen crown? That’s why I decided to crochet a ring with a crown on-top. The ring itself is not too difficult, it’s placing the ring on-top without interruption the work that’s challenging. If you find that too difficult you can crochet the 2 as seperate pieces and sew them together afterwards.
Good luck!
What you need for this project:
some standard thin cotton SMC
crochet hook 2 and 3mm.
Choose your combination of yarn and needle so that your crochet will get really tight in order to make the crown stand-up.
Step 1: the ring
Use hook 3mm, chain 16-18-20, check the size of the ring around your finger. Switch to hook 2 and join the ring by sc into the first chain, make sure that the ring isn't turned.
sc into every chn. make 3 rounds.
Step 2: The Crown:
Here comes the tricky part. Take a look at the ring from the top and imagine the crown that you are going to " raise" on-top of the ring. This helps you understand that you will need to crochet in almost the opposite direction than the work of the ring is directed.
chain 1, now sc1 in a bump in the middle of the ring, this will be the left extremity of the imaginary circle/base of the crown, chn 1. You have now "crossed" the width of the ring. sc2 in the chains that form the outer edge of the ring. chn 1, sc 1 in a bump int he middle of the ring, chn 1, sc 2 in the chains that form the opposite outer edge. This should form a neat circle of 10 loops.
sc into every chain and make 2 rounds.
Now the spikes. Check that you have 10 chains we will be making spikes in every 2nd chn, 5 spikes in total. sc in the 1st chain, chn 2, sc back into the first chain of the string, sc 1 back into the chain where you made the 1st sc. this forms the first spike. jump 1. sc into the next chain of the crown, chn 3, sc back into the 2nd and 1st chain of the string, sc back into the chain where you made the 2nd sc. jump 1. sc into the next chain of the crown, chn 4, sc back into the 3rd, 2nd and 1st chain of the string, sc back into the chain where you made the 3rd sc. jump 1. sc into the next chain of the crown, chn 3, sc back into the 2nd and 1st chain of the string, sc back into the chain where you made the 4th sc. jump 1. sc into the next chain of the crown, chn 2, sc back into the 1st chain of the string, sc back into the chain where you made the 5th sc. make 1 pull-stitch to close the loop, cut the thread and pull through.
step 3: finish and decorate
work away the 2 loose ends with a needle. Embroider sequins and beads to decorate.
Good luck! and please message me, if you make any yourself, would love to see it!
More news and variations on crochet Queensday rings tomorrow, so stay tuned!
Good luck!
What you need for this project:
some standard thin cotton SMC
crochet hook 2 and 3mm.
Choose your combination of yarn and needle so that your crochet will get really tight in order to make the crown stand-up.
Step 1: the ring
Use hook 3mm, chain 16-18-20, check the size of the ring around your finger. Switch to hook 2 and join the ring by sc into the first chain, make sure that the ring isn't turned.
sc into every chn. make 3 rounds.
Step 2: The Crown:
Here comes the tricky part. Take a look at the ring from the top and imagine the crown that you are going to " raise" on-top of the ring. This helps you understand that you will need to crochet in almost the opposite direction than the work of the ring is directed.
chain 1, now sc1 in a bump in the middle of the ring, this will be the left extremity of the imaginary circle/base of the crown, chn 1. You have now "crossed" the width of the ring. sc2 in the chains that form the outer edge of the ring. chn 1, sc 1 in a bump int he middle of the ring, chn 1, sc 2 in the chains that form the opposite outer edge. This should form a neat circle of 10 loops.
sc into every chain and make 2 rounds.
Now the spikes. Check that you have 10 chains we will be making spikes in every 2nd chn, 5 spikes in total. sc in the 1st chain, chn 2, sc back into the first chain of the string, sc 1 back into the chain where you made the 1st sc. this forms the first spike. jump 1. sc into the next chain of the crown, chn 3, sc back into the 2nd and 1st chain of the string, sc back into the chain where you made the 2nd sc. jump 1. sc into the next chain of the crown, chn 4, sc back into the 3rd, 2nd and 1st chain of the string, sc back into the chain where you made the 3rd sc. jump 1. sc into the next chain of the crown, chn 3, sc back into the 2nd and 1st chain of the string, sc back into the chain where you made the 4th sc. jump 1. sc into the next chain of the crown, chn 2, sc back into the 1st chain of the string, sc back into the chain where you made the 5th sc. make 1 pull-stitch to close the loop, cut the thread and pull through.
step 3: finish and decorate
work away the 2 loose ends with a needle. Embroider sequins and beads to decorate.
Good luck! and please message me, if you make any yourself, would love to see it!
More news and variations on crochet Queensday rings tomorrow, so stay tuned!
Friday, 5 April 2013
make a "lace" perspex lasercut bracelet
About time that I get this one shared properly, not really like anything else that you have seen from the Knitbitch so far, but I also like to experiment with these new crafting techniques. A couple of years ago I joined the hypercraft masterclass in the Fablab (de Waag) in Amsterdam. I used a pattern that my hubby had developed for a completely different purpose, tried different materials, it turned out to work quite amazingly in clear perspex. This last trial was made at the Protospace in Utrecht.
For this project you will need some perspex, clear transparent makes for a more blingy, crystallized version, milky makes for a more romantic crochet like version.
Perspex;
10x25 cm, thickness 4mm
STEP 1
check out the settings of the laser-cutter and make a test. You need to get two settings right; one to cut and one to etch. Also the laser-cutter will be able to read particular colors, note these ones down in order to "code" your pattern in the right way.
STEP 2
Prepare your pattern.
Make your pattern as much as possible out of one HAIRline. I was a lazy pattern drawer so I had several layers of lines on-top of each-other and that doesn't make things easier.
I had prepared my pattern in Illustrator, but the laser-cutter at Protospace only reads CorelDraw files, so I had to convert the file, that is re-open the file in CorelDraw. That messes up the file, so I had to re color-code all my lines as intended for either cutting or etching. and as I had not made my drawing with one line but numerous overlayed lines, I had to catch them all and turn them into the right color.
If you can do this step smartly it can really save you a lot of time.
STEP 3
Cutting the bracelet.
upload the pattern to the laser-cutter.
I made 2 versions of the pattern, one with more and one with less perforations. and also tried a simple version with simple diamond shapes, actually because I wanted to embroider on it (which I have never done)
This is what it looked like when it came out of the cutter.
It turned out that my pattern has some breeches in the lines (all those overlayed lines) so the bracelets where not coming loose from the material. With a little bit of help of a handsaw and a polisher I got the piece detached in the end.
STEP 4
Bending the bracelet
With a sort of blow torch (huge creme brullee burner) I got the piece bent into the shape of a bracelet. With the help of the hubby. This was quite complicated. The punch-pattern makes the plexiglas heat up unevenly, and therefore it didn't bend in a homogeneous way and also the blow torch left some not so nice firemarks.
after the fact I got some feedback and kind advise on my Flickr uploads to try a 200 degree oven instead of a blow torch link. So I would say try that instead.
This is what the bracelet finally looked like.Next time I'm going to try fluorescent.
Here are some other trials I made.
milky transparent material. too small size which made the whole very frail and lots of pieces broke off.
Leather cuff version. I had high hopes for this one, but it really is not very nice.
For this project you will need some perspex, clear transparent makes for a more blingy, crystallized version, milky makes for a more romantic crochet like version.
Perspex;
10x25 cm, thickness 4mm
STEP 1
check out the settings of the laser-cutter and make a test. You need to get two settings right; one to cut and one to etch. Also the laser-cutter will be able to read particular colors, note these ones down in order to "code" your pattern in the right way.
STEP 2
Prepare your pattern.
Make your pattern as much as possible out of one HAIRline. I was a lazy pattern drawer so I had several layers of lines on-top of each-other and that doesn't make things easier.
I had prepared my pattern in Illustrator, but the laser-cutter at Protospace only reads CorelDraw files, so I had to convert the file, that is re-open the file in CorelDraw. That messes up the file, so I had to re color-code all my lines as intended for either cutting or etching. and as I had not made my drawing with one line but numerous overlayed lines, I had to catch them all and turn them into the right color.
If you can do this step smartly it can really save you a lot of time.
STEP 3
Cutting the bracelet.
upload the pattern to the laser-cutter.
I made 2 versions of the pattern, one with more and one with less perforations. and also tried a simple version with simple diamond shapes, actually because I wanted to embroider on it (which I have never done)
This is what it looked like when it came out of the cutter.
It turned out that my pattern has some breeches in the lines (all those overlayed lines) so the bracelets where not coming loose from the material. With a little bit of help of a handsaw and a polisher I got the piece detached in the end.
STEP 4
Bending the bracelet
With a sort of blow torch (huge creme brullee burner) I got the piece bent into the shape of a bracelet. With the help of the hubby. This was quite complicated. The punch-pattern makes the plexiglas heat up unevenly, and therefore it didn't bend in a homogeneous way and also the blow torch left some not so nice firemarks.
after the fact I got some feedback and kind advise on my Flickr uploads to try a 200 degree oven instead of a blow torch link. So I would say try that instead.
This is what the bracelet finally looked like.Next time I'm going to try fluorescent.
Here are some other trials I made.
milky transparent material. too small size which made the whole very frail and lots of pieces broke off.
Leather cuff version. I had high hopes for this one, but it really is not very nice.
Sunday, 11 March 2012
make a mega-crochet pouf
I have just finished my 3rd pouf and thought now it's time to share the recipe. The poufs are decorative in your living room, and very easy to make, the only thing you really need is a lot of patience. And a lot of yarn, it takes appx 2kgs to make a pouf. I'm using a fake spool-knitting technique that my mum taught me to turn thin yarn into thick cord.
For this project you will need;
2-2,5 kg of yarn
2 sock-knitting needles in a fitting size
STEP 1. Choosing the right yarn.
I have made all my poufs using industrial grades wool or wool-mixes. I have bought them all in the salvation shop or at factory outlets and they had no brand-names so I cannot share. But what I go after is "hard" wool, wool that has not been through softening processes and is maybe even mixed with some polyester to make it tough. I think I have used carpet-yarn, furniture-yarn or weaving-yarns. I use yarns that knit on needles 3,5mm - 5mm. I promise that if somebody finds a brand-name that I will share it with you all here.
If you cannot get hold of this kind of yarn or you are lazy you can also buy very thick wool (rather expensive) or cord and consequently skip step 2 - making a cord.
The Norwegan Pickles sell a very thick yarn that can be used for a pouf; Pickles fat and happy.
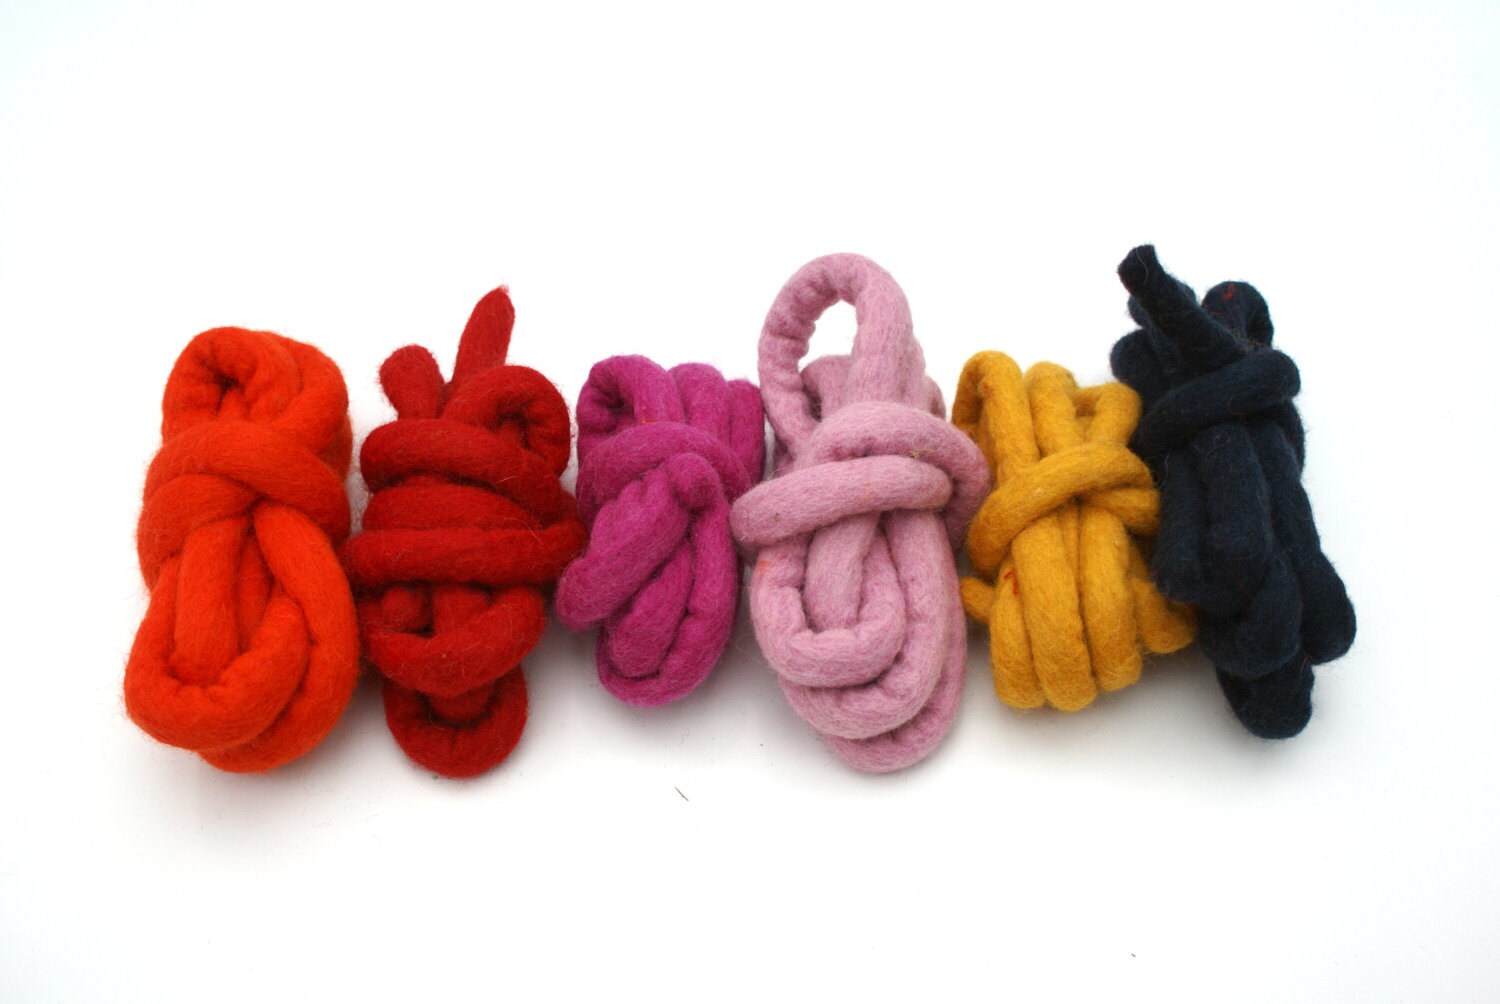
You can use Zpaghetti, cut up old t-shirts yourself, or buy tube-yarn or felted cord. The last you can get
at Etsy (handmade) or as industrial grade felt i.e. at Filtmaatschappij Rotterdam (this is where Christien Meindersma got hers, I think) You can also use woven (cotton) cord i.e. from the Hema.
STEP 2. making a cord. Spool-knitting the yarn
Real spool-knitting takes too long I think, so I'm resorting to fake spool-knitting, this is a method that my mum taught me. You will need 2 sock-knitting needles, so knitting needles that have two open ends. With thinner yarn you cast on 5 or maybe even 6 stitches (needles size 3,5mm), with thicker yarn you cast on 4 (needle size 5mm). The tube should eventually become approximately as wide as a finger.
it's very simple after finishing a row, you push through the needle that the loops are resting on, and you pass the yarn behind and then knit another row. This way the tube will form by itself, the loops at the extremities will look a bit looser, but as we will afterwards crochet the cord, that's not really a problem.
you can either roll-up the cord or you can crochet as you go along.
STEP 3. crochet the pouf
To crochet the pouf you first crochet a spiral circle increasing stitches, then you crochet appx. 3 rounds straight, and then you crochet another spiral where you decrease stitches. I crochet simply using my fingers because I think it's too much hassle trying to find a crochet-needle in the right size. You would probably need 15-20mm crochet needle if you want to use a needle. It's important that you crochet very tight, because afterwards you will fill the pouf, and if the work isn't tight then gaps in the work will appear, and that is not pretty.
When you crochet, a loop to crochet into always has 2 chains, I crochet into only one of them and the one to the back, this is because I like the pattern this creates, you get a thin line of chains that run around the pouf. It's also possible to crochet into both chains, then you will end-up using a little more yarn.
Rnd1; make a loop, then chain 2, then 6sc into the 2nd loop from the hook, a bit tricky. This makes the first tiny round.
Rnd2: 2sc into all 6 loops: 12 sc
rnd 3-10; inc. 6 sc evenly spaced: 60 sc.
rnd 11-12 (or 13, 14 depending on how tall you want the pouf); work even in sc.
rnd 13-22; dec 6 sc evenly spaced; 6 sc.
depending on how much yarn you have or how big you want your pouf, you decide how big you make the spiral. My biggest pouf, the light-grey one had 60 sc at it's max. The smallest, the dark brown had 48sc at it's max.
STEP 4. fill the pouf.
before you crochet the last 3 rounds you should fill the pouf. I have used old duvets to fill mine, you can also use cushions or you can crochet around an old second hand pouf. Also sometimes if you are lucky you can found pouf fillings i.e. at the Ikea. I don't recommend to work with fiber-filling, it's too loose. or you will need to work it into a sack/cushion before filling the pouf.
For this project you will need;
2-2,5 kg of yarn
2 sock-knitting needles in a fitting size
| 3 poufs, finally finish |
| 2 poufs |
| 2 poufs - close-up |
| The first pouf. |
I have made all my poufs using industrial grades wool or wool-mixes. I have bought them all in the salvation shop or at factory outlets and they had no brand-names so I cannot share. But what I go after is "hard" wool, wool that has not been through softening processes and is maybe even mixed with some polyester to make it tough. I think I have used carpet-yarn, furniture-yarn or weaving-yarns. I use yarns that knit on needles 3,5mm - 5mm. I promise that if somebody finds a brand-name that I will share it with you all here.
If you cannot get hold of this kind of yarn or you are lazy you can also buy very thick wool (rather expensive) or cord and consequently skip step 2 - making a cord.
The Norwegan Pickles sell a very thick yarn that can be used for a pouf; Pickles fat and happy.
You can use Zpaghetti, cut up old t-shirts yourself, or buy tube-yarn or felted cord. The last you can get
at Etsy (handmade) or as industrial grade felt i.e. at Filtmaatschappij Rotterdam (this is where Christien Meindersma got hers, I think) You can also use woven (cotton) cord i.e. from the Hema.
STEP 2. making a cord. Spool-knitting the yarn
Real spool-knitting takes too long I think, so I'm resorting to fake spool-knitting, this is a method that my mum taught me. You will need 2 sock-knitting needles, so knitting needles that have two open ends. With thinner yarn you cast on 5 or maybe even 6 stitches (needles size 3,5mm), with thicker yarn you cast on 4 (needle size 5mm). The tube should eventually become approximately as wide as a finger.
| casting on 5 on a sock needle |
| casting on 5 on a sock needle |
it's very simple after finishing a row, you push through the needle that the loops are resting on, and you pass the yarn behind and then knit another row. This way the tube will form by itself, the loops at the extremities will look a bit looser, but as we will afterwards crochet the cord, that's not really a problem.
| finished casting on |
| push the needle to the left |
| push the needle to the left |
| push the needle all the way to the left |
| now knit the next row by pulling the yarn behind the work |
| now knit the next row by pulling the yarn behind the work |
| now knit the next row by pulling the yarn behind the work |
| now knit the next row by pulling the yarn behind the work |
| here you can see how the yarn is pulled behind the work. |
| finish the next row |
you can either roll-up the cord or you can crochet as you go along.
STEP 3. crochet the pouf
To crochet the pouf you first crochet a spiral circle increasing stitches, then you crochet appx. 3 rounds straight, and then you crochet another spiral where you decrease stitches. I crochet simply using my fingers because I think it's too much hassle trying to find a crochet-needle in the right size. You would probably need 15-20mm crochet needle if you want to use a needle. It's important that you crochet very tight, because afterwards you will fill the pouf, and if the work isn't tight then gaps in the work will appear, and that is not pretty.
When you crochet, a loop to crochet into always has 2 chains, I crochet into only one of them and the one to the back, this is because I like the pattern this creates, you get a thin line of chains that run around the pouf. It's also possible to crochet into both chains, then you will end-up using a little more yarn.
Rnd1; make a loop, then chain 2, then 6sc into the 2nd loop from the hook, a bit tricky. This makes the first tiny round.
Rnd2: 2sc into all 6 loops: 12 sc
rnd 3-10; inc. 6 sc evenly spaced: 60 sc.
rnd 11-12 (or 13, 14 depending on how tall you want the pouf); work even in sc.
rnd 13-22; dec 6 sc evenly spaced; 6 sc.
depending on how much yarn you have or how big you want your pouf, you decide how big you make the spiral. My biggest pouf, the light-grey one had 60 sc at it's max. The smallest, the dark brown had 48sc at it's max.
STEP 4. fill the pouf.
before you crochet the last 3 rounds you should fill the pouf. I have used old duvets to fill mine, you can also use cushions or you can crochet around an old second hand pouf. Also sometimes if you are lucky you can found pouf fillings i.e. at the Ikea. I don't recommend to work with fiber-filling, it's too loose. or you will need to work it into a sack/cushion before filling the pouf.
Location:
Wittevrouwen, Nederland
Subscribe to:
Posts (Atom)


